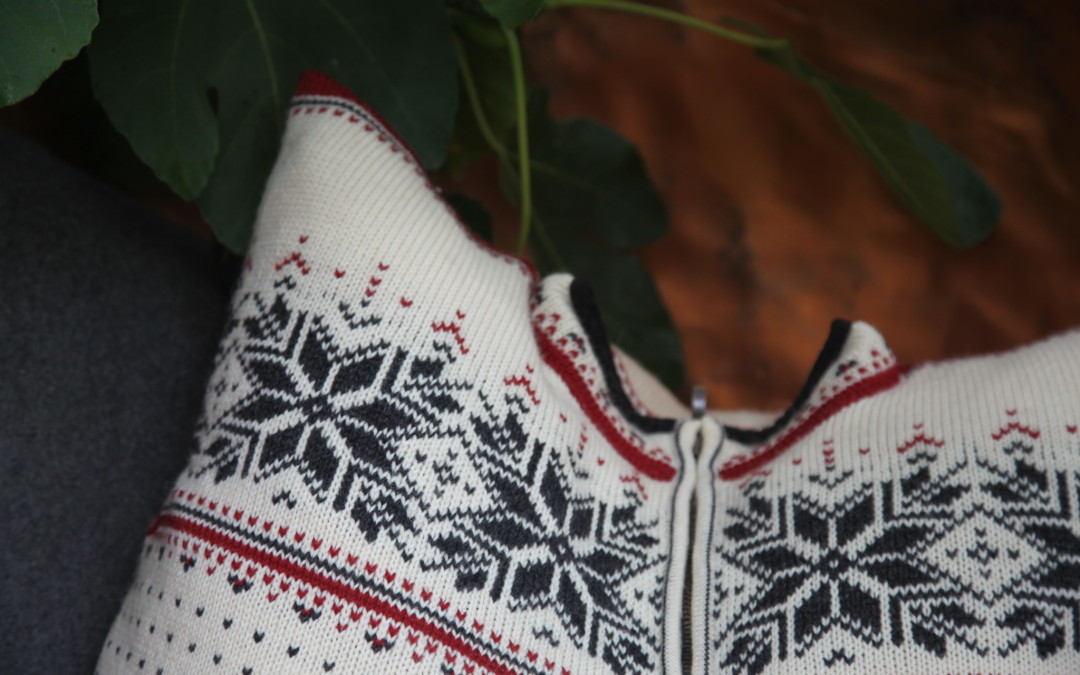
It’s always a bit sad when a favourite jumper really does have to be put away- but there are only so many holes or unravellings that even the cat, or the garden can accept. I guess the bossy ‘house-clearance gurus’ would be hard pressed to understand this, but memories are often very strongly attached, even intertwined with, the clothes we wear – and sometimes we just aren’t ready to lose these along with the jumper.
However, by taking an hour, a needle and some thread we can recycle any jumper, or skirt, or scarf – whatever it might be- into a cushion, or lampshade, or patchworked chair cover. But cushions are the easiest to make, and if the material is fragile, a cushion can always be for looking at, rather than sitting on. So this winter, by the fire, make a cushion from a jumper… Either mend or avoid the holes or damaged bits.
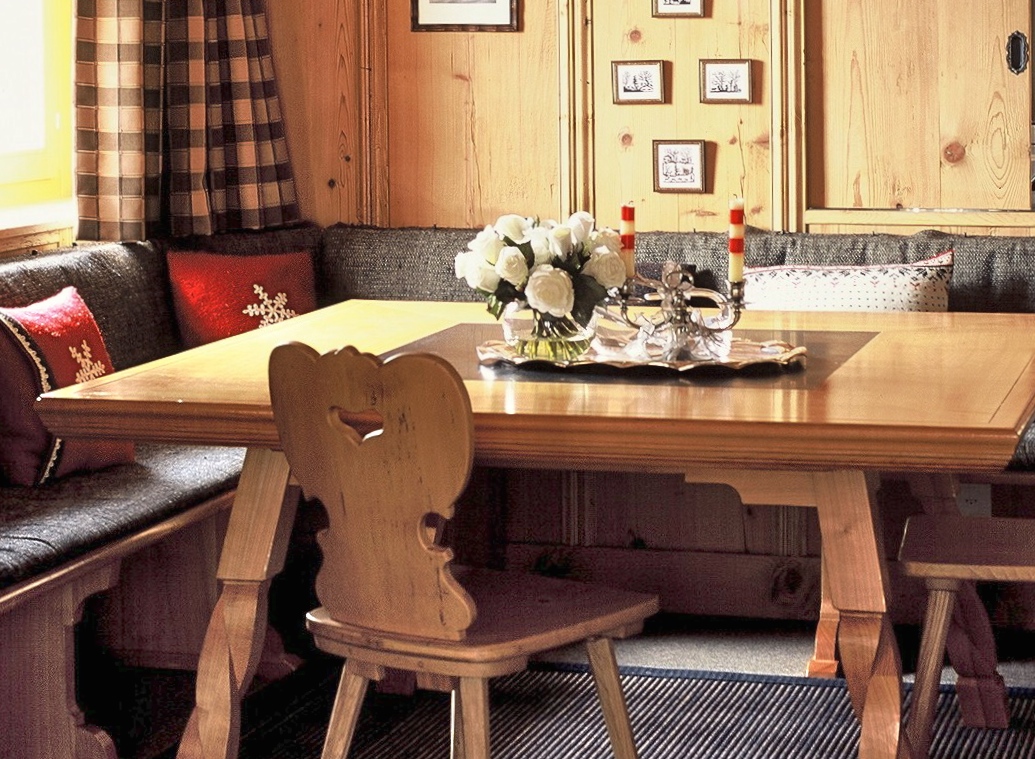
If you don’t have an old one, then a new one will do just as well. Here we used the sleeves for a seat cushion to join the snowflake cushions at the kitchen table and the body for the other. The lovely Dale of Norway pattern and the wool it is made of is perfect in colour and type, both for inside the home and for the outside, un-phased by early morning dew or dusk dampness.
This cushion can be made entirely by hand – for the therapy, or the lack of machine, or the ‘can’t be bothered to get the machine out-ness’ of the fireside sofa, or kitchen table…
- Decide which pieces you can use: is there is enough good on the jumper front and the back and beneath the arms to make decent sized squares; do the side seams need to be undone or can they stay as they are; does the hem need to be bound or re-inforced to support fraying or wear?
- Decide how the opening will be: can the buttons or zip be used; if so will they be along the centre, or just off centre, or will they form the closure; will they be on the front or the back ?
- Mark out the cushion front and back – either use the whole jumper from beneath the arms to make a square or rectangle with the seams forming two of the sides, or plan out two pieces, one from the jumper front and one from the jumper back, as large as you can have or want.
- Before cutting, secure the knitting by stitching just within the marking pins- if by machine use a medium sided stitch with a slight zig zag so that it doesn’t get stuck or stretch the knitting. Or if by hand, cut first then quickly oversew before it’s lifted from the table.
- Then bind any fragile edges that you’re wanting to use for the closure. Use ribbon, bias binding, a crocheted edge or blanket stitch.
- Pin the raw edges together, so that right sides are facing. If the jumper bottom will form the closure and the side seams the two sides, the top edge only will be pinned; if the zip or buttons will sit across the cushion then either the top and bottom or all four sides will be pinned together.
- Stitch the pinned sides – again with a shallow zig zag stitch to prevent the knitting from stretching. If by hand, use back stitch and just stretch the knitwear very slightly as you go – after a few cms or couple of inches you’ll get the feel for it.
- Press the seam. Turn right side out.
- Button or zip up the given closure or make it. Either add small buttons and stitch eyelets into the opposite side, or add the cushion pad, then hand stitch the open edge as appropriate.
- Plump up the pad, bashing it from both sides to force the feathers into the corners.